

Working with Jira
Welcome!
This tutorial connects Testomat.io to Jira and walks you through the everyday flow: link a test to a Jira issue, report a defect from a run, and see testing status back in Jira. Once this is set up, tests and Jira issues stay tied together, so the team can see what is tested and what is failing.
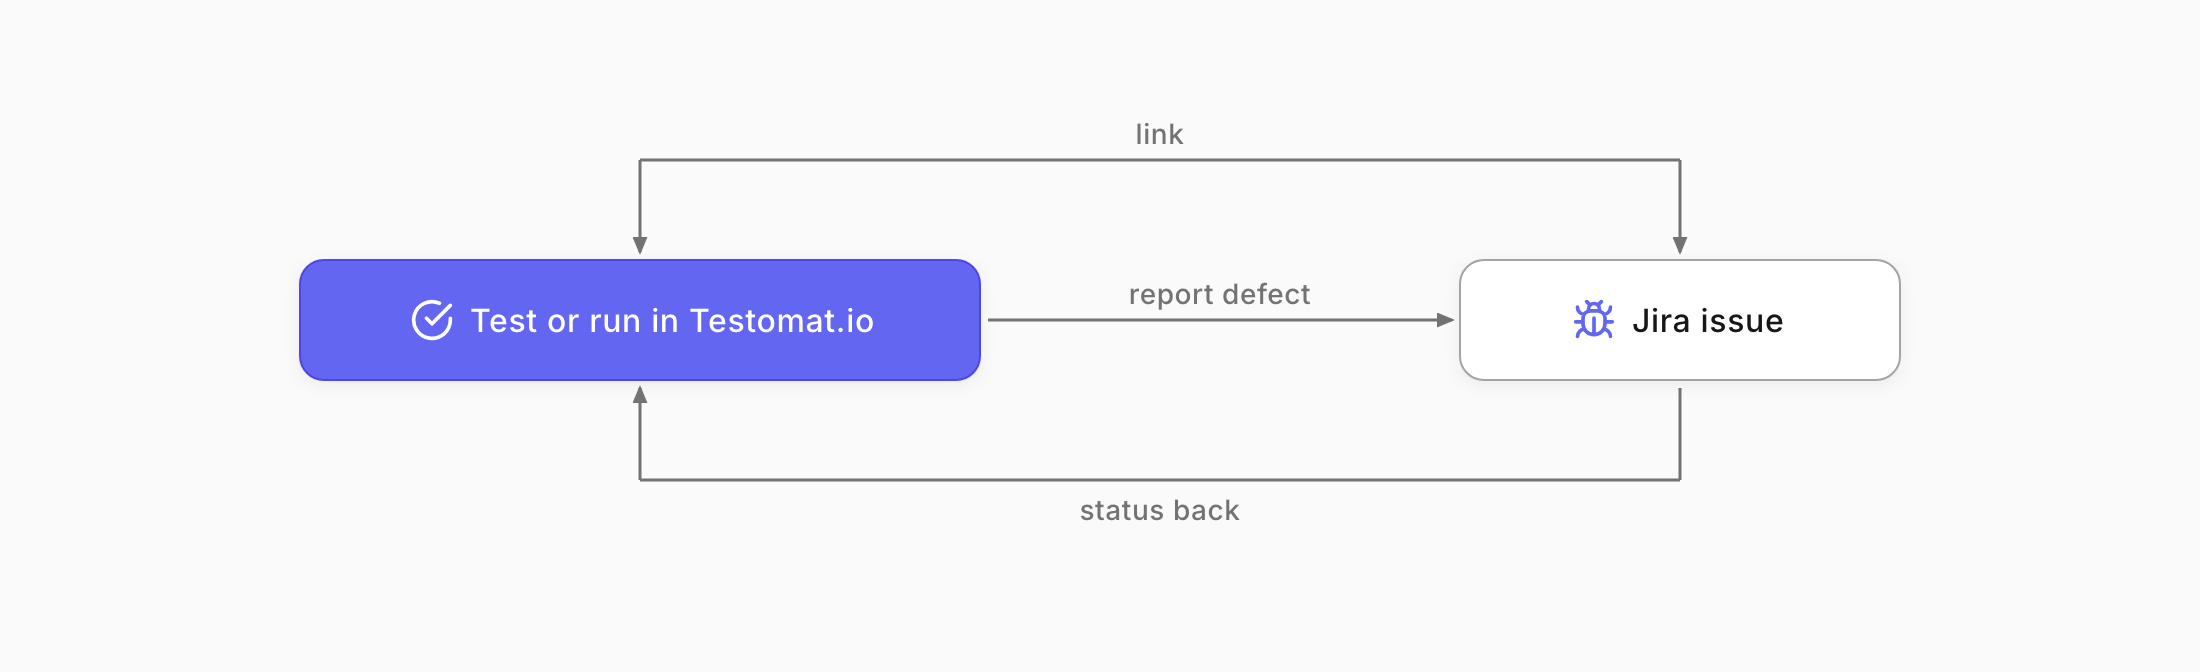
What you will do:
- Connect your Jira project.
- Link a test to a Jira issue.
- Report a defect from a run.
- See the status synced back in Jira.
Before you start
Section titled “Before you start”Make sure you have:
- Jira profile access, with administrator rights in the Jira workspace.
- A Manager or Owner role in your Testomat.io project.
- The Testomat.io plugin is installed in Jira.
Connect your Jira project
Section titled “Connect your Jira project”- In your Testomat.io project, open Settings in the sidebar.
- Click Jira Integration.
- Click Add Jira project.
- In the New Jira project panel, select the connection type and enter the details.
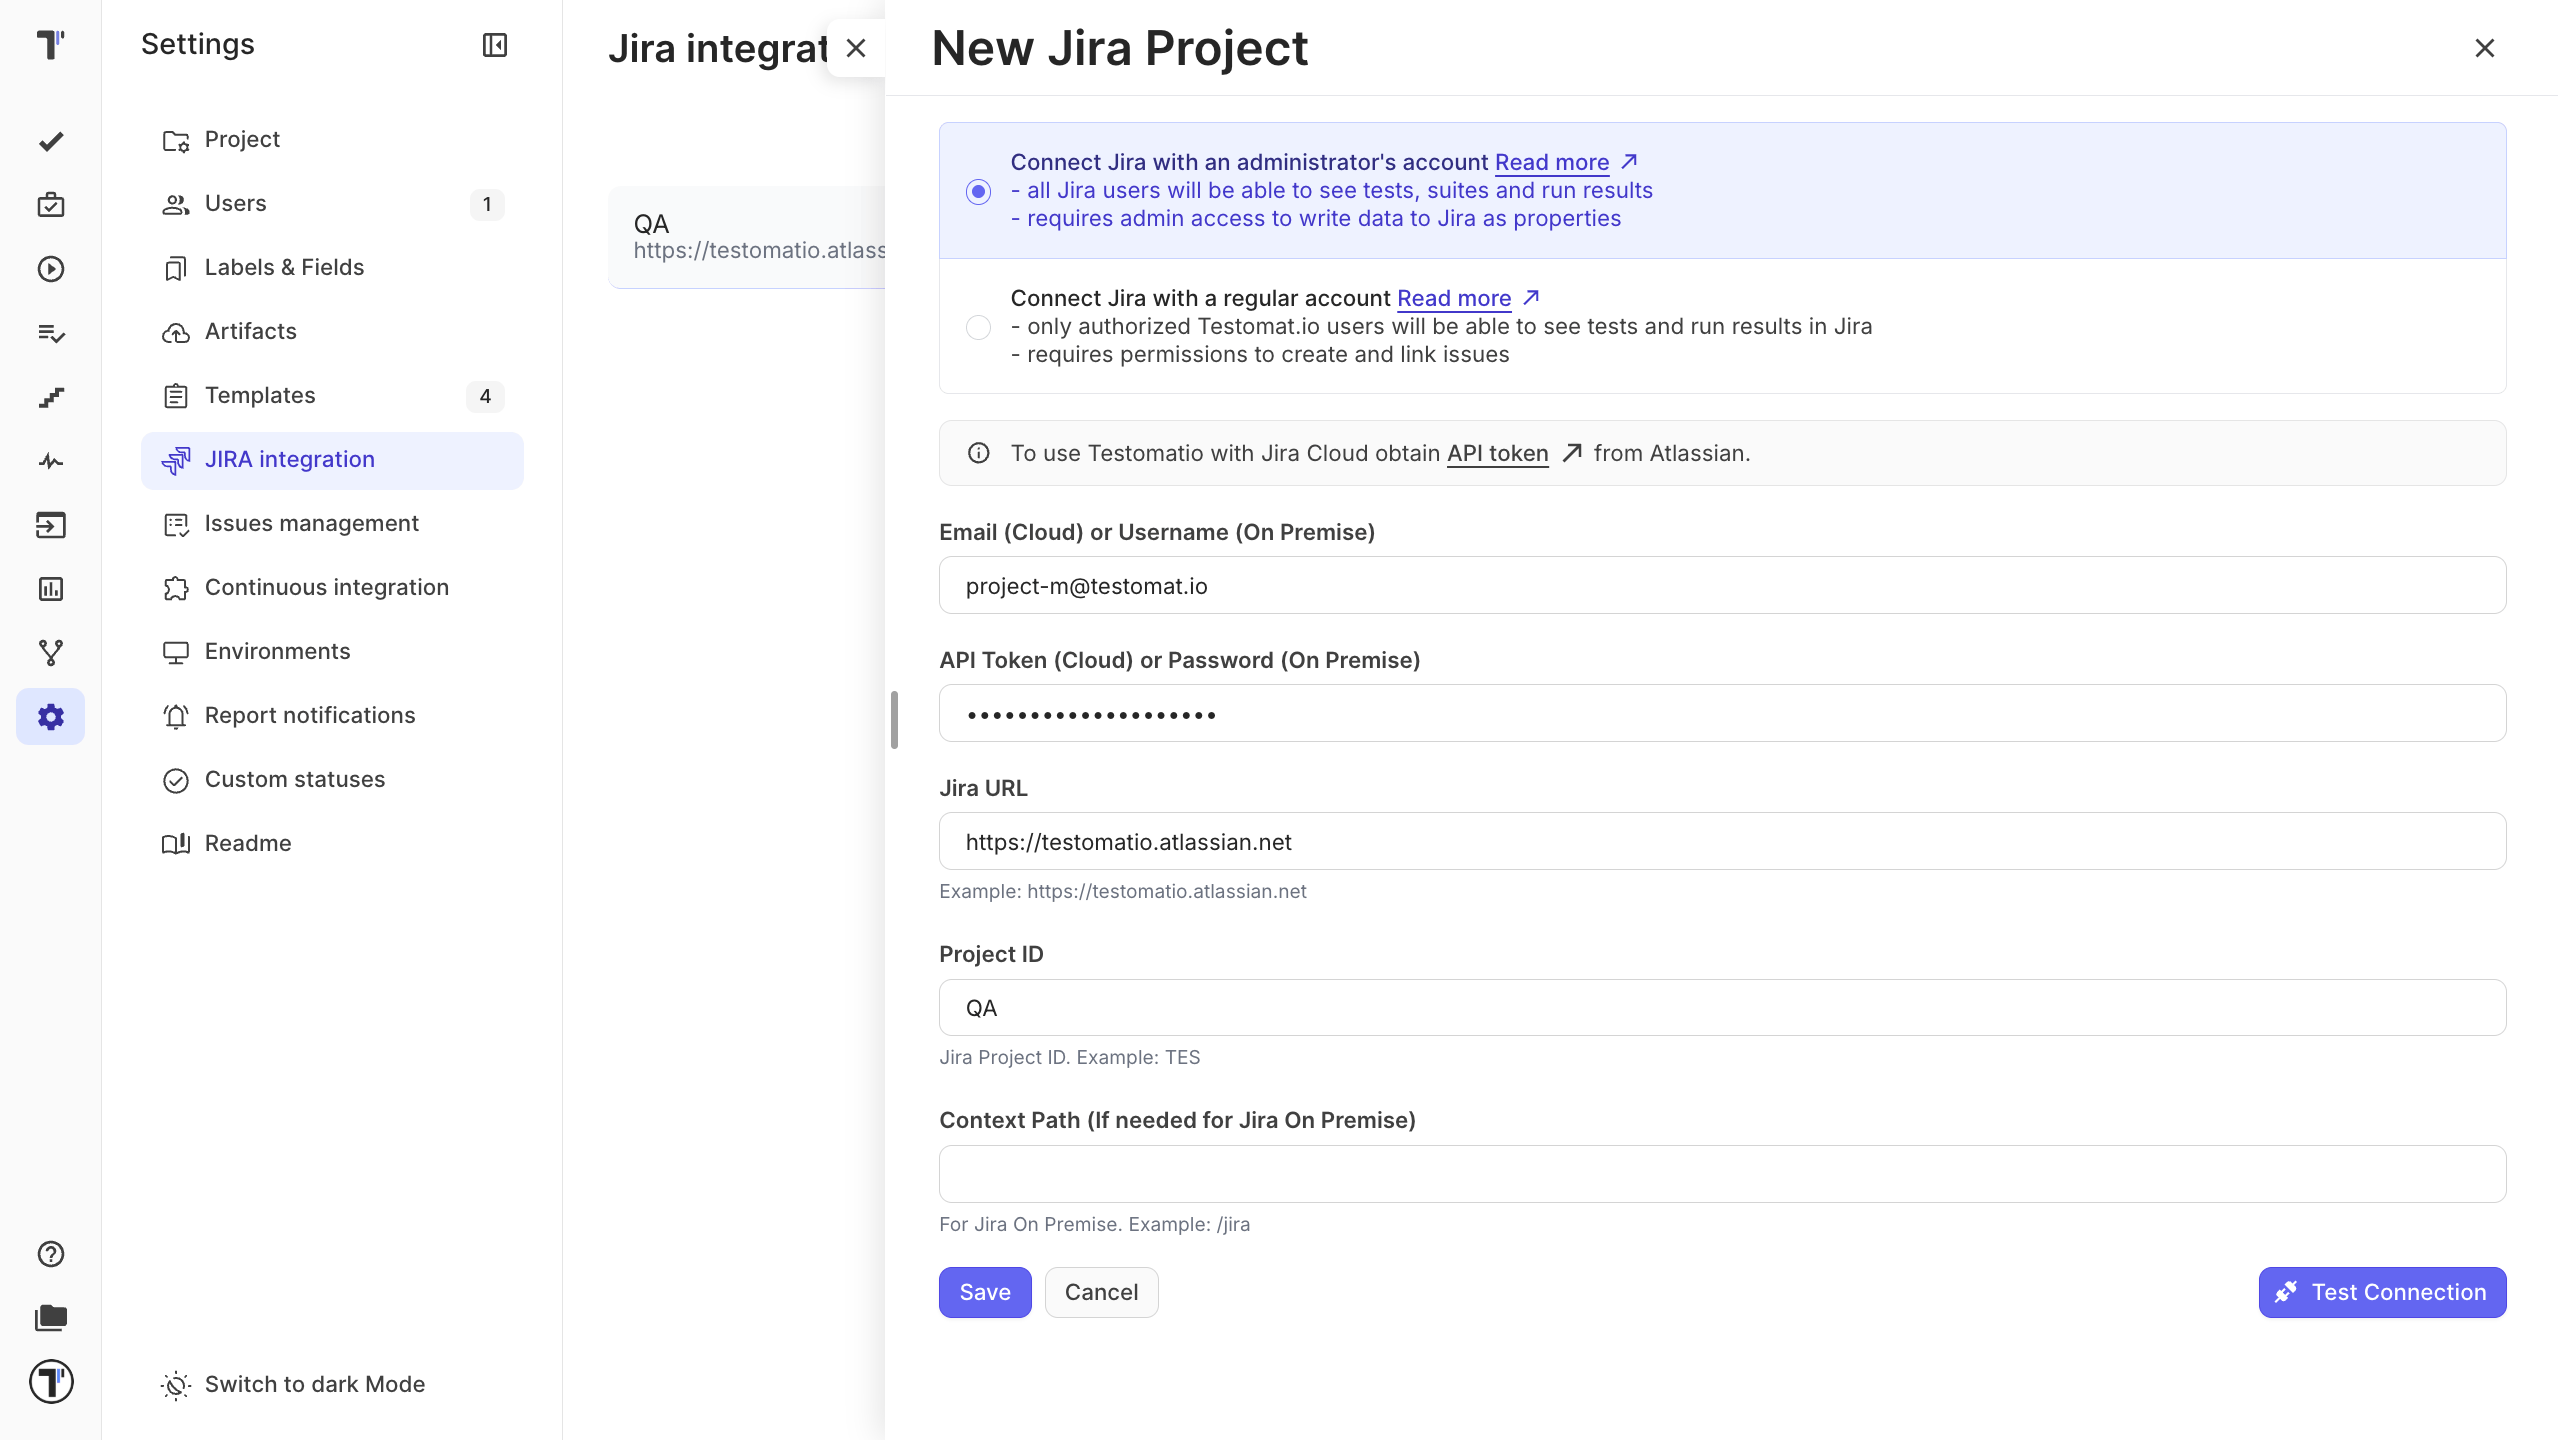
Pick the connection type based on who should see testing data in Jira:
| The account type | Tests and results are visible to |
|---|---|
| Administrator account | Linked tests and results are visible to all Jira users through the plugin, while editing and running still require a Testomat.io login. Use this if you want everyone in Jira to see coverage. |
| Regular account | Linked tests and results are visible only to logged-in Testomat.io users. Use this if you need to restrict access. |
Once saved, your Jira project is connected and ready.
Link a test to a Jira issue
Section titled “Link a test to a Jira issue”Linking ties a test to the story or bug it covers, so coverage shows on both sides.
- Select the test, or several tests, on the Tests page.
- Click Link.
- Type in the Jira issue to link them to.
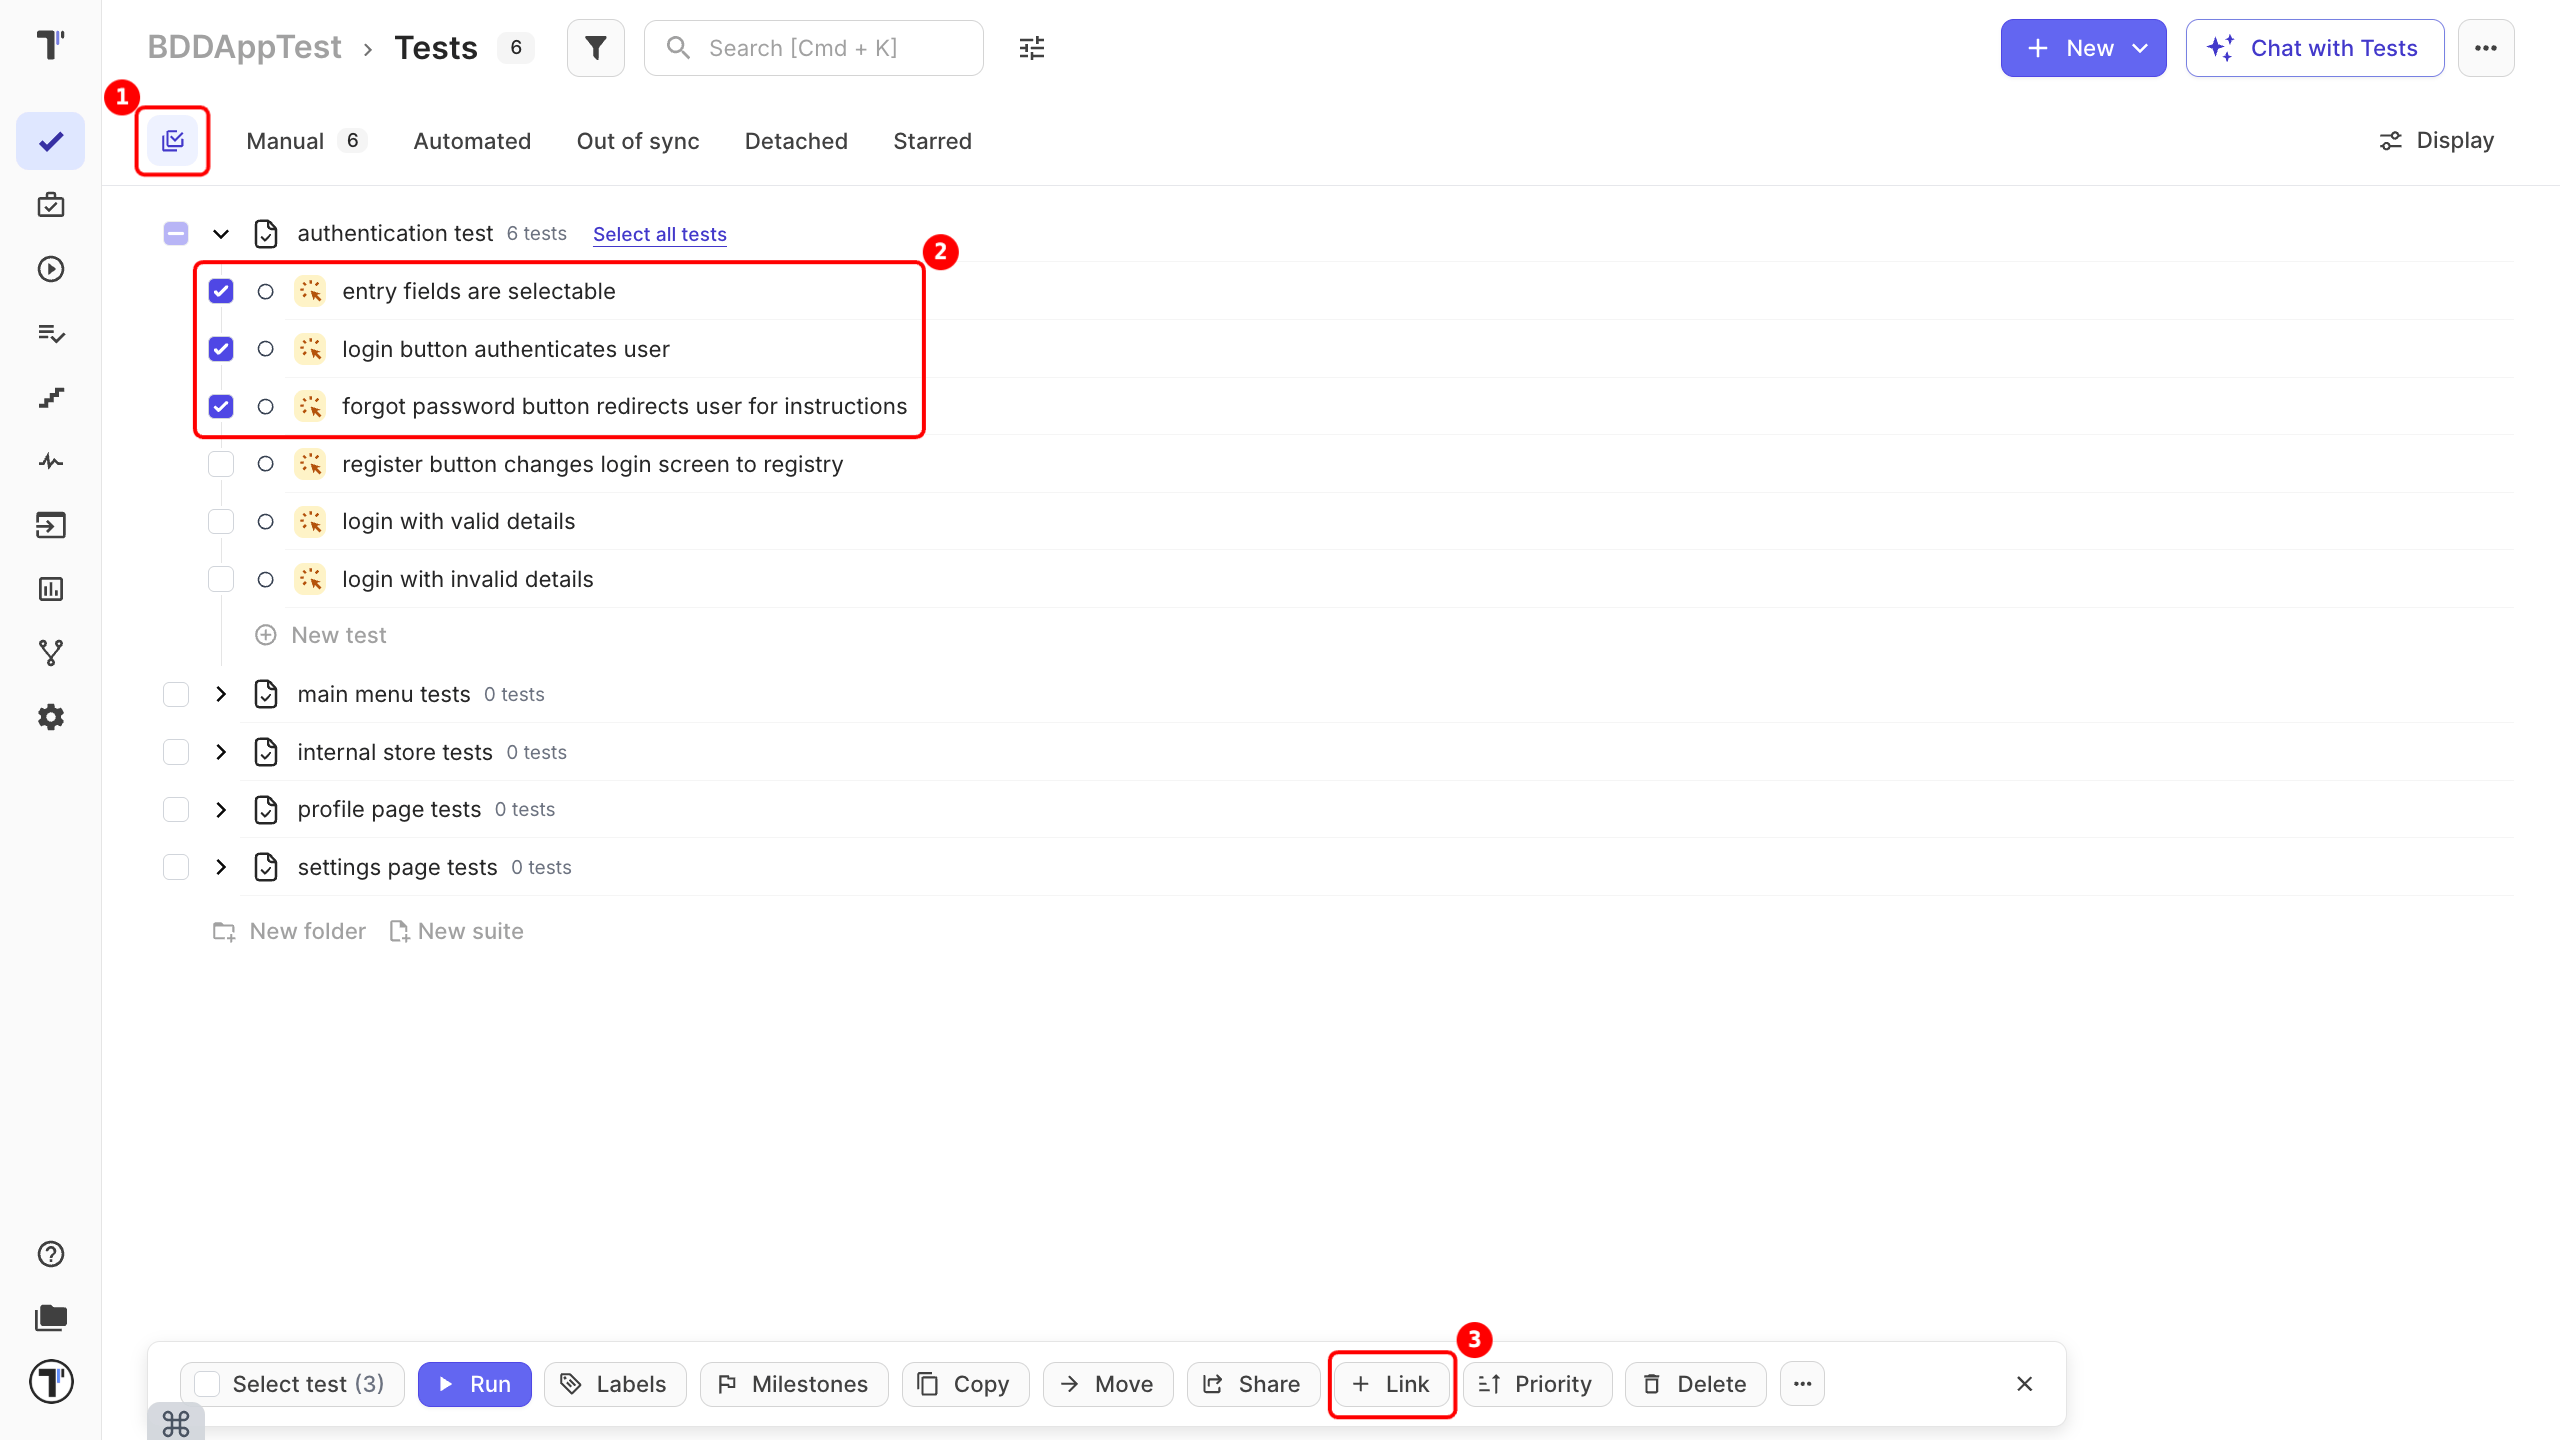
The link now appears on both the test and the Jira issue. You can also link a test to the Jira issue by hovering over the test and clicking the link icon.
Report a defect from a run
Section titled “Report a defect from a run”When a test fails during a run, you can create a Jira bug without leaving Testomat.io.
- In the run, open the failed test.
- Choose to report a defect and enter the Jira issue link.
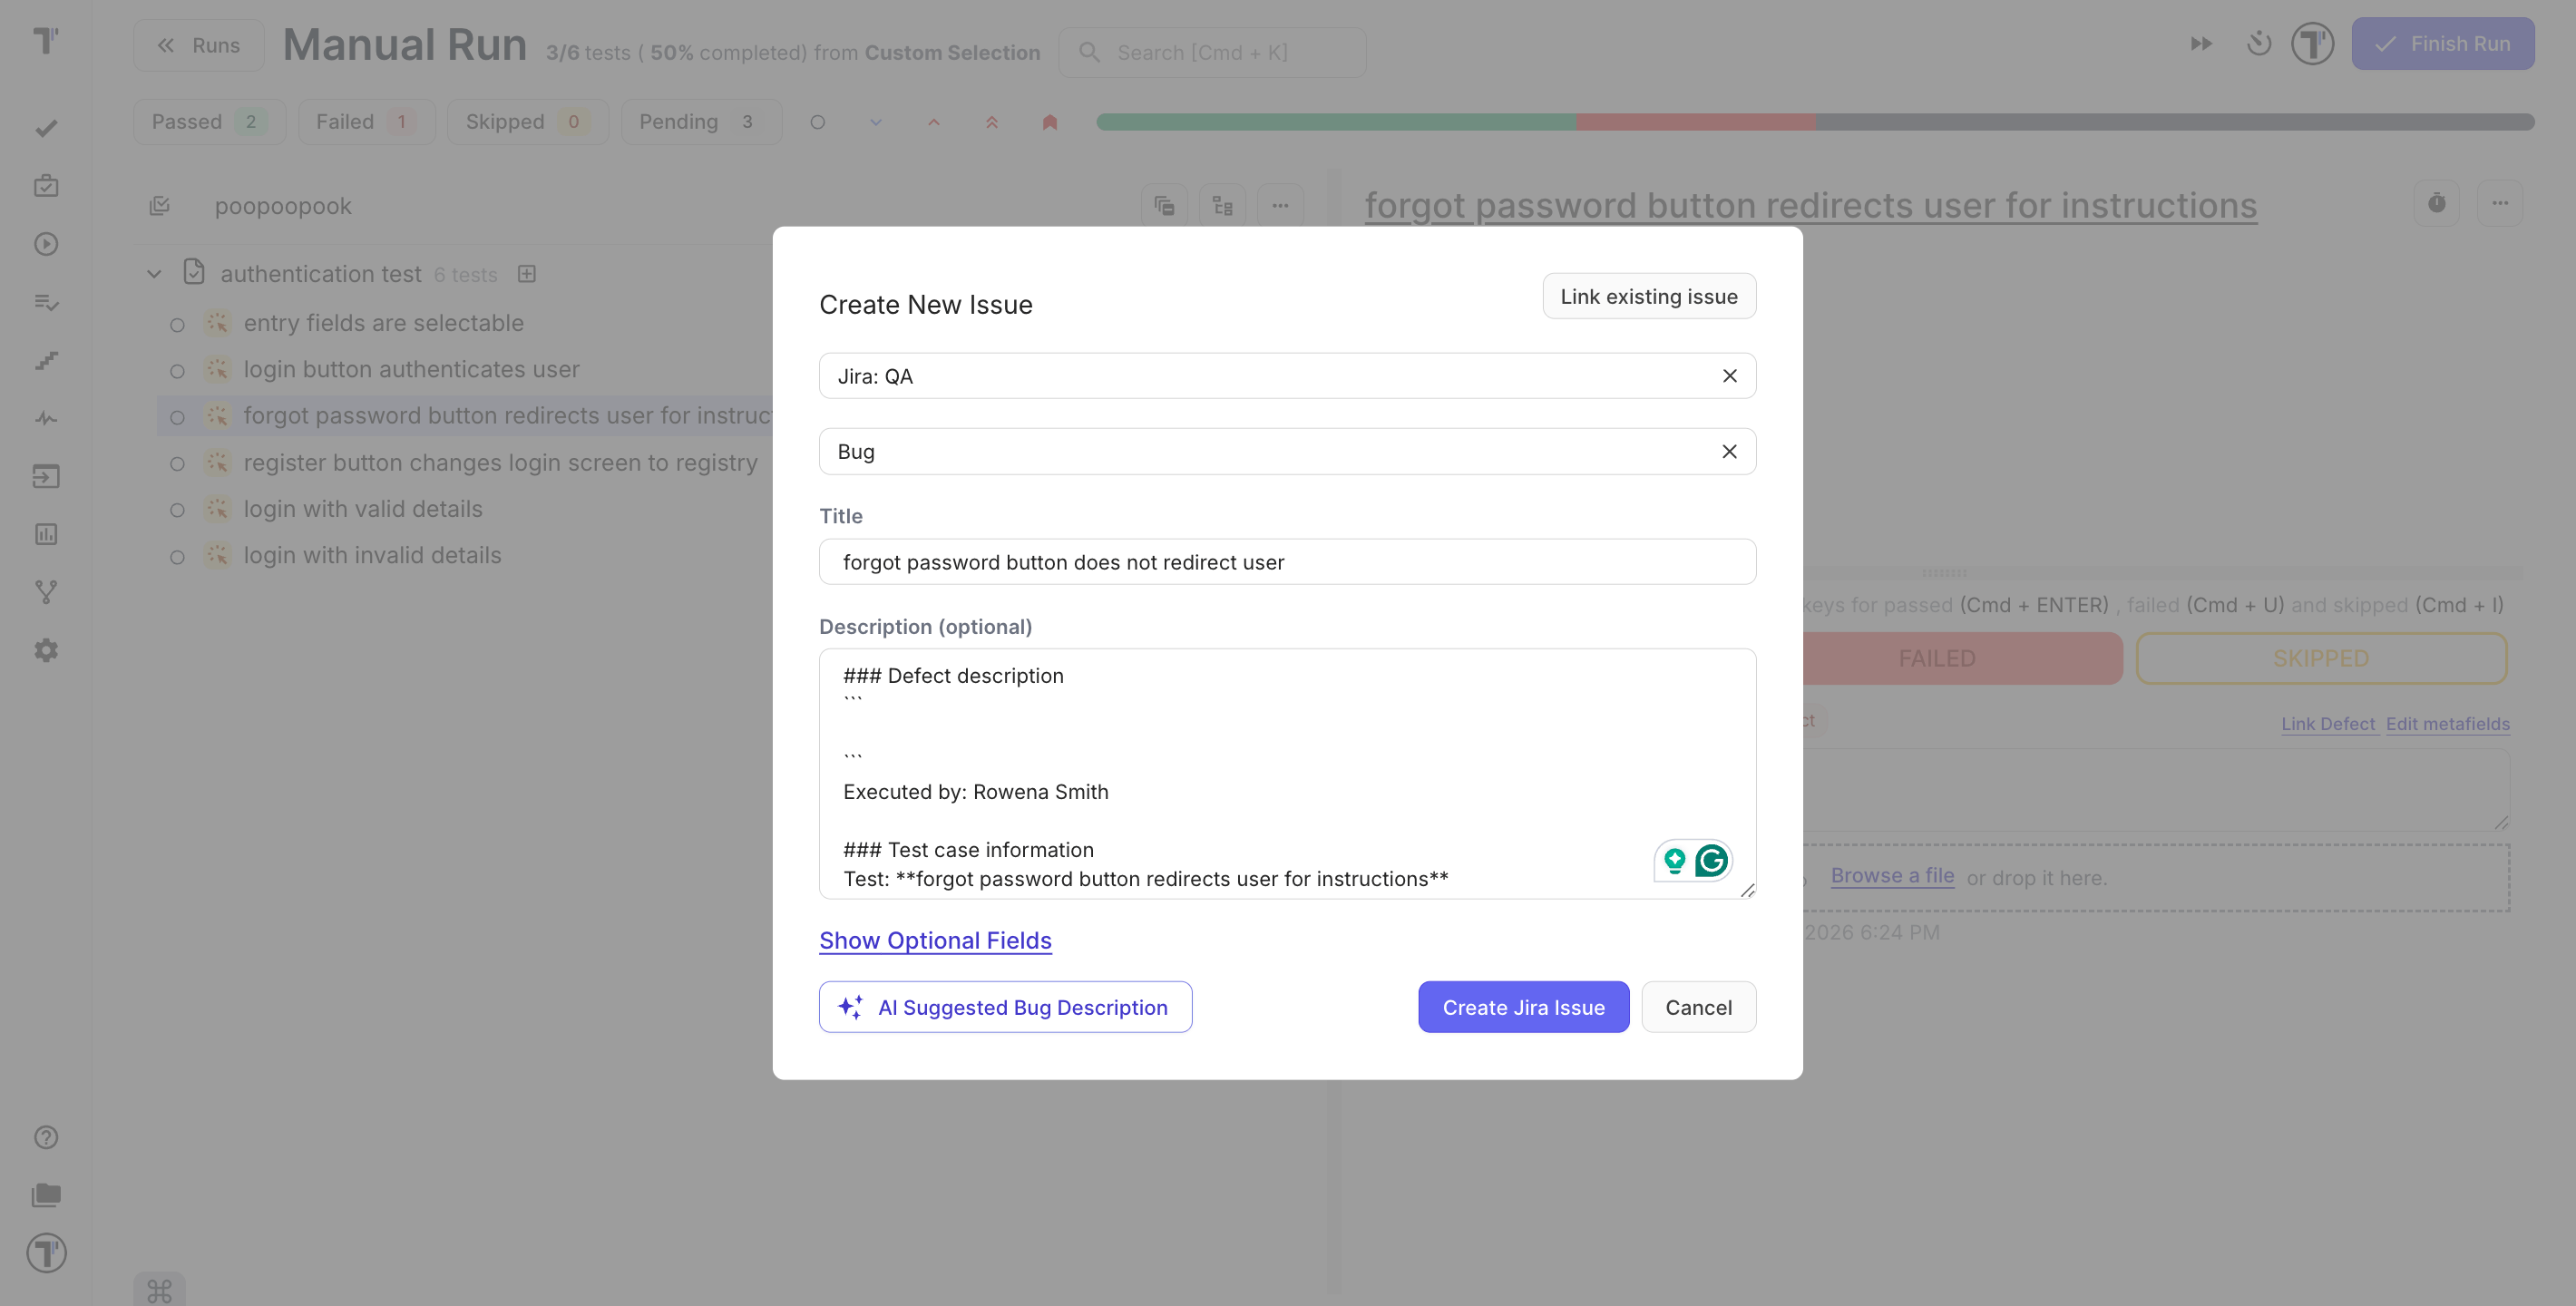
- If needed, you can create a new issue and link the defect to it:
- Click Create new issue.
- Select Jira profile and Jira Issue type.
- Enter the issue Title and Description.
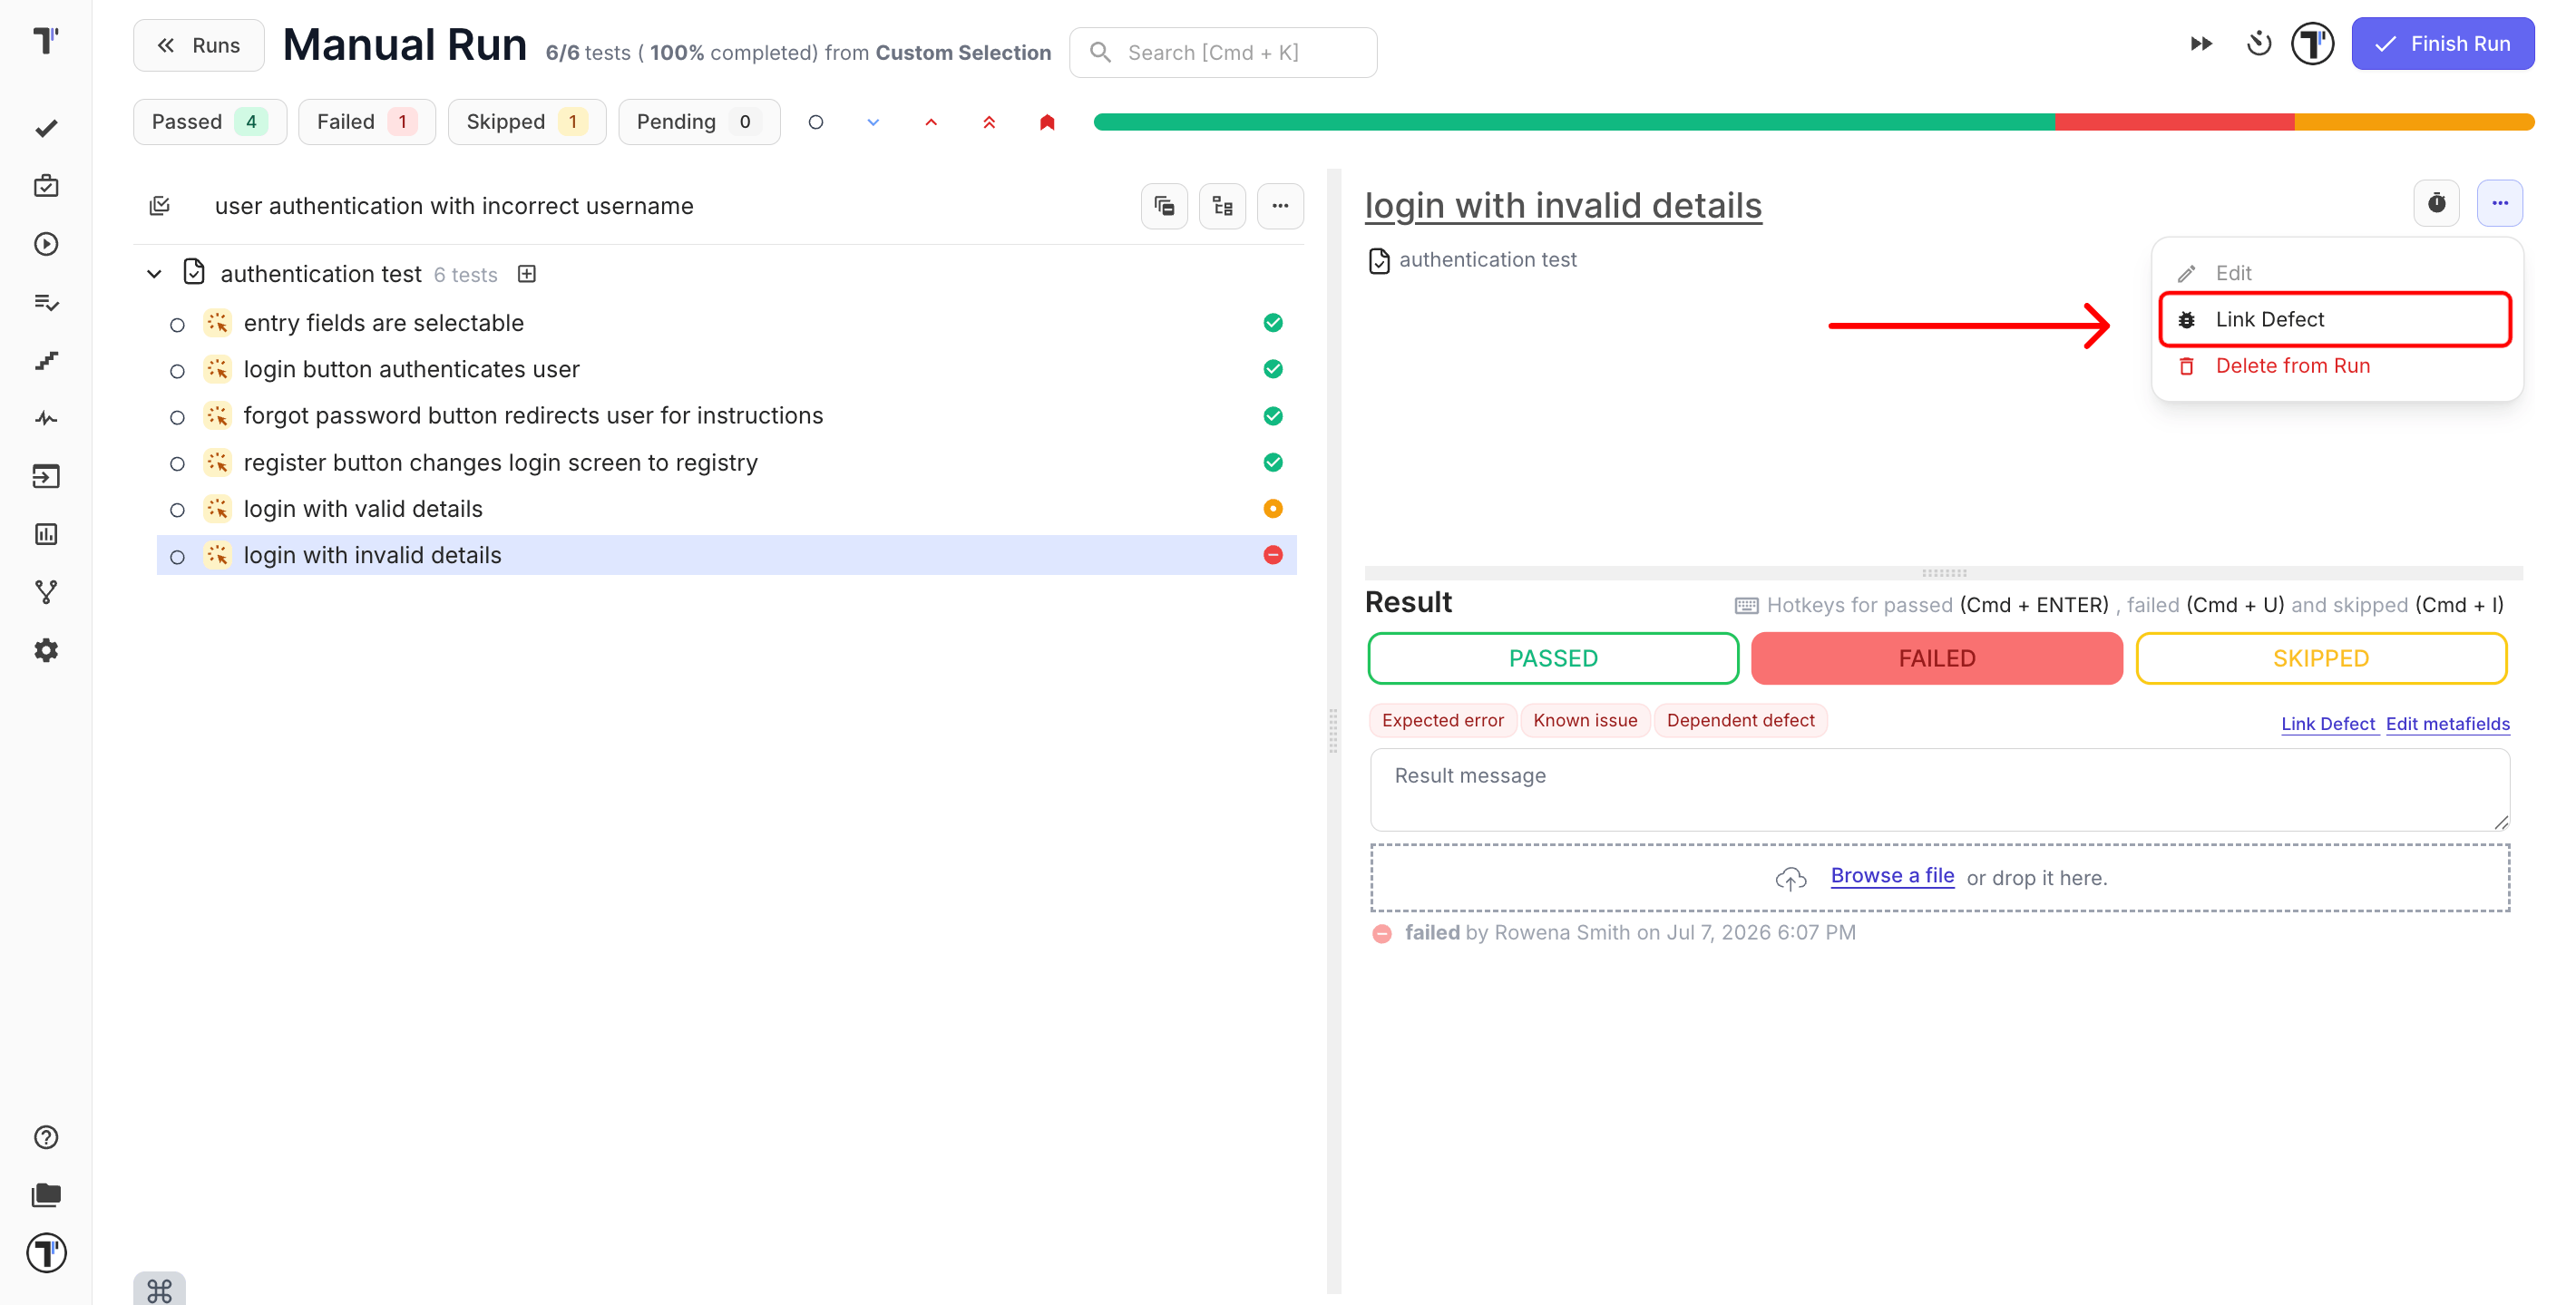
- Click Create Jira issue. The new issue has been created in Jira and linked to the test.
See the status synced back in Jira
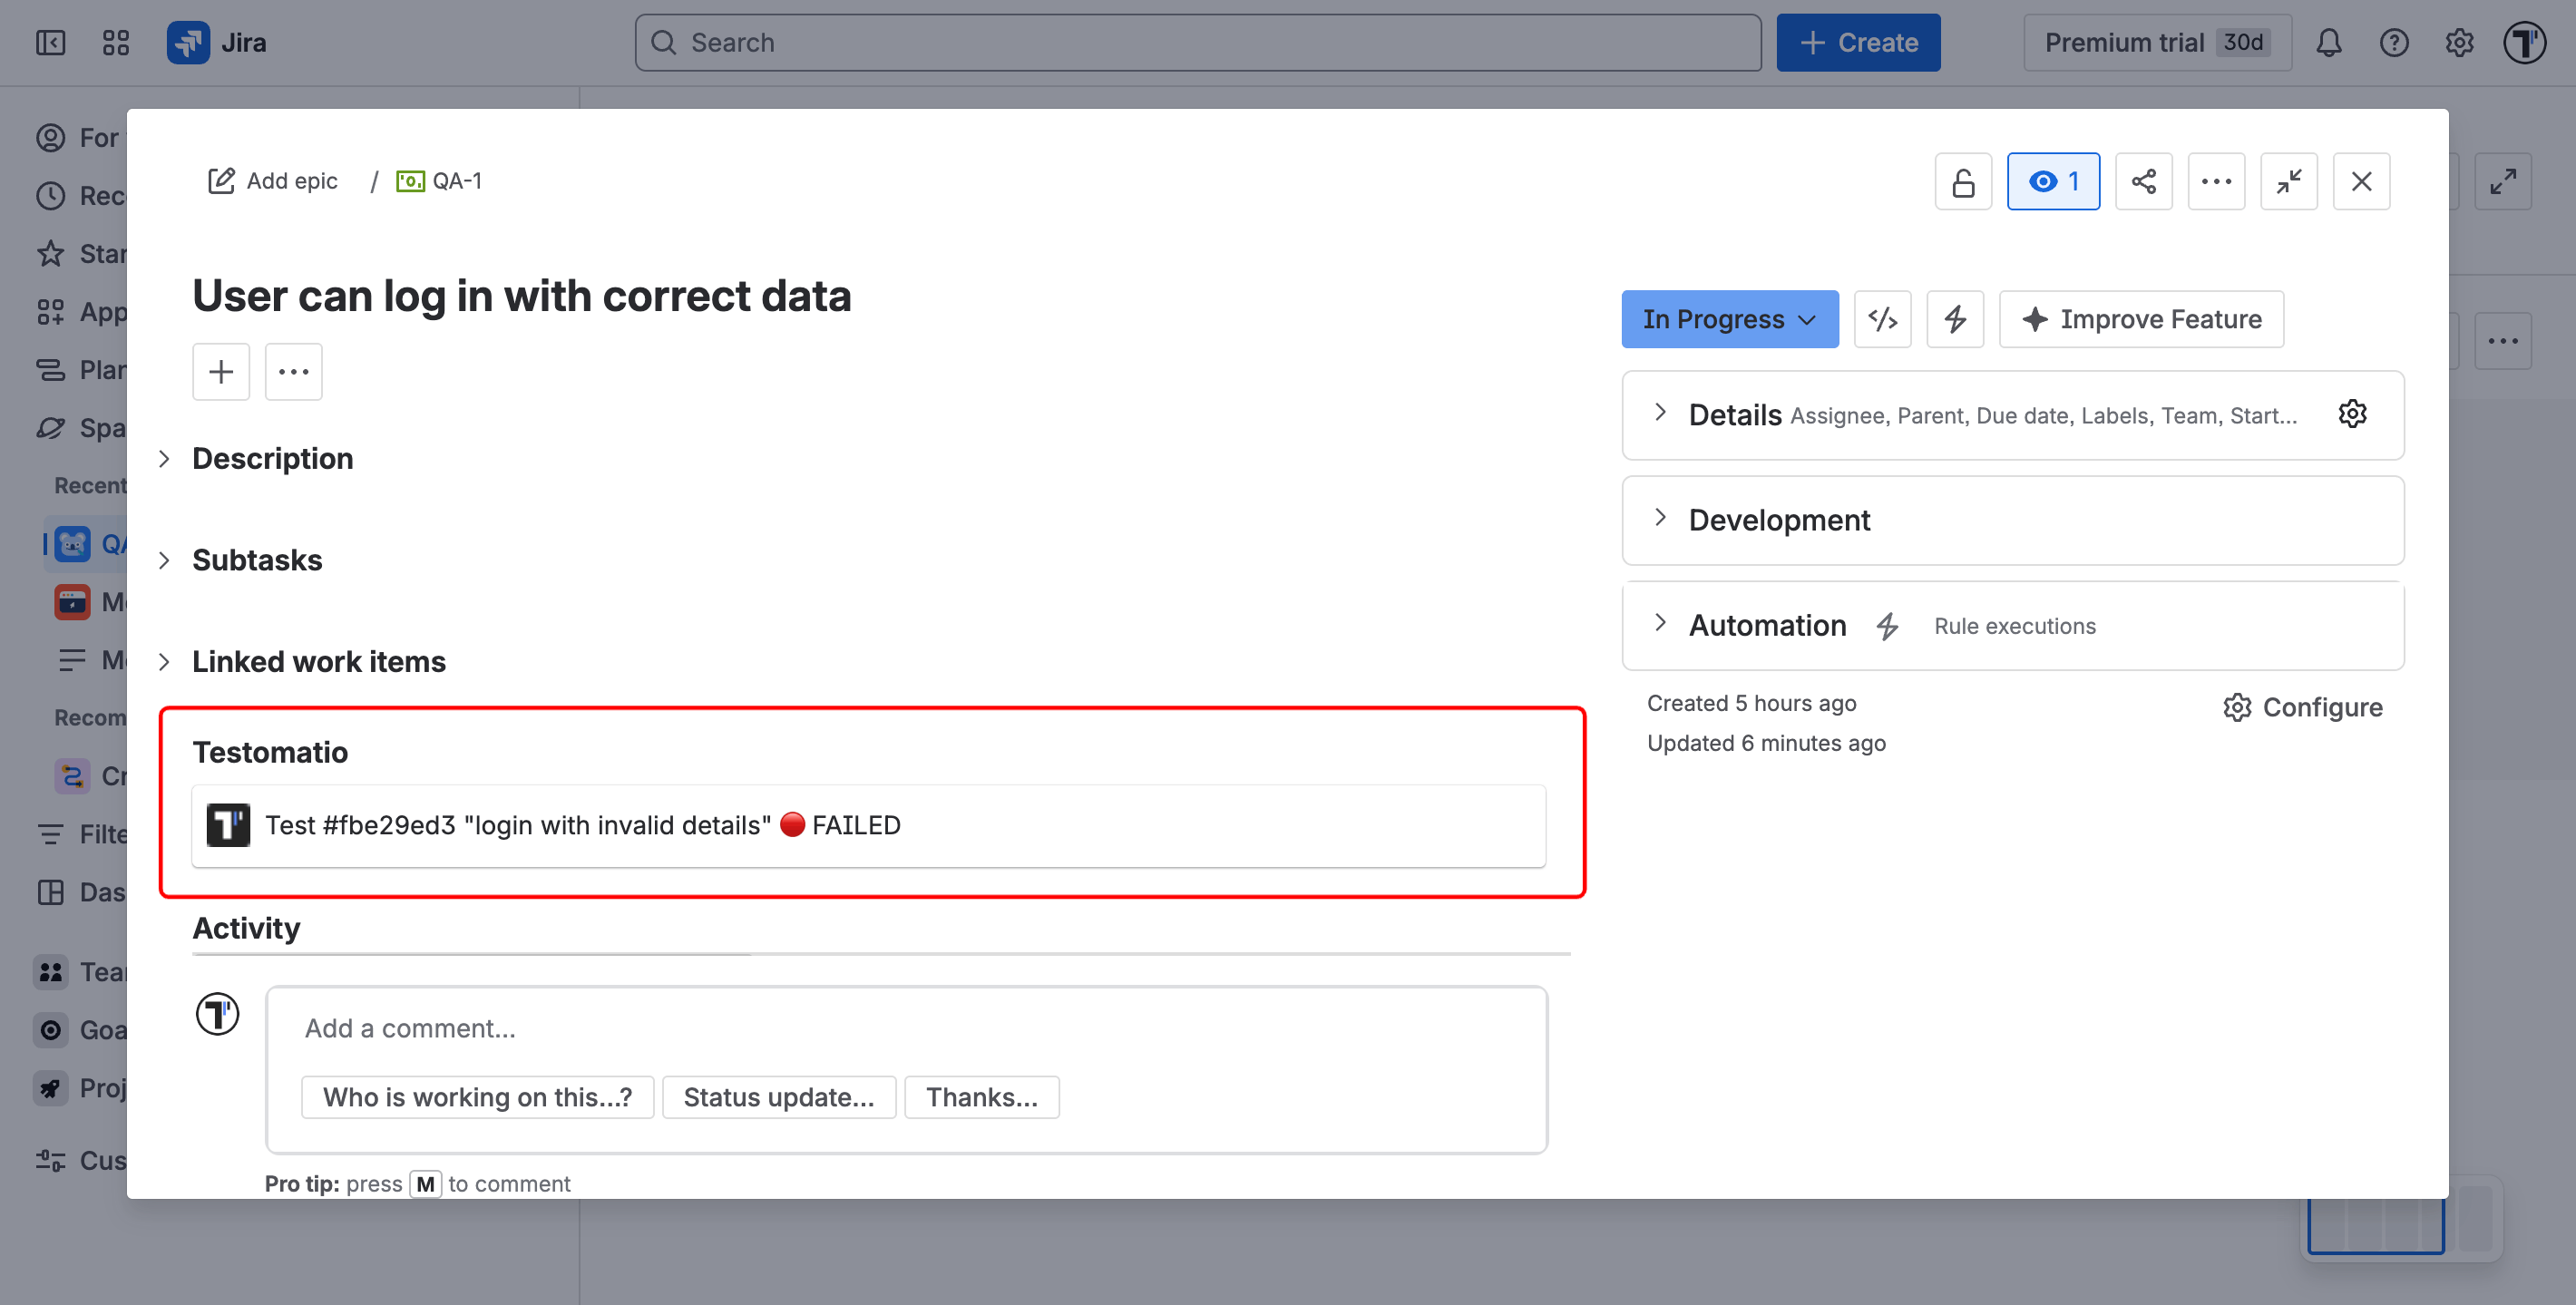
Section titled “See the status synced back in Jira”With the plugin in place, your Jira issues show the linked tests and their latest results, so a product owner can open an issue and see whether it passed or failed.
- Open the linked issue in Jira.
- View the Testomat.io panel to see linked tests, coverage, and the latest run status.
If something looks out of date, use Synchronize with Jira from the integration to refresh the link.
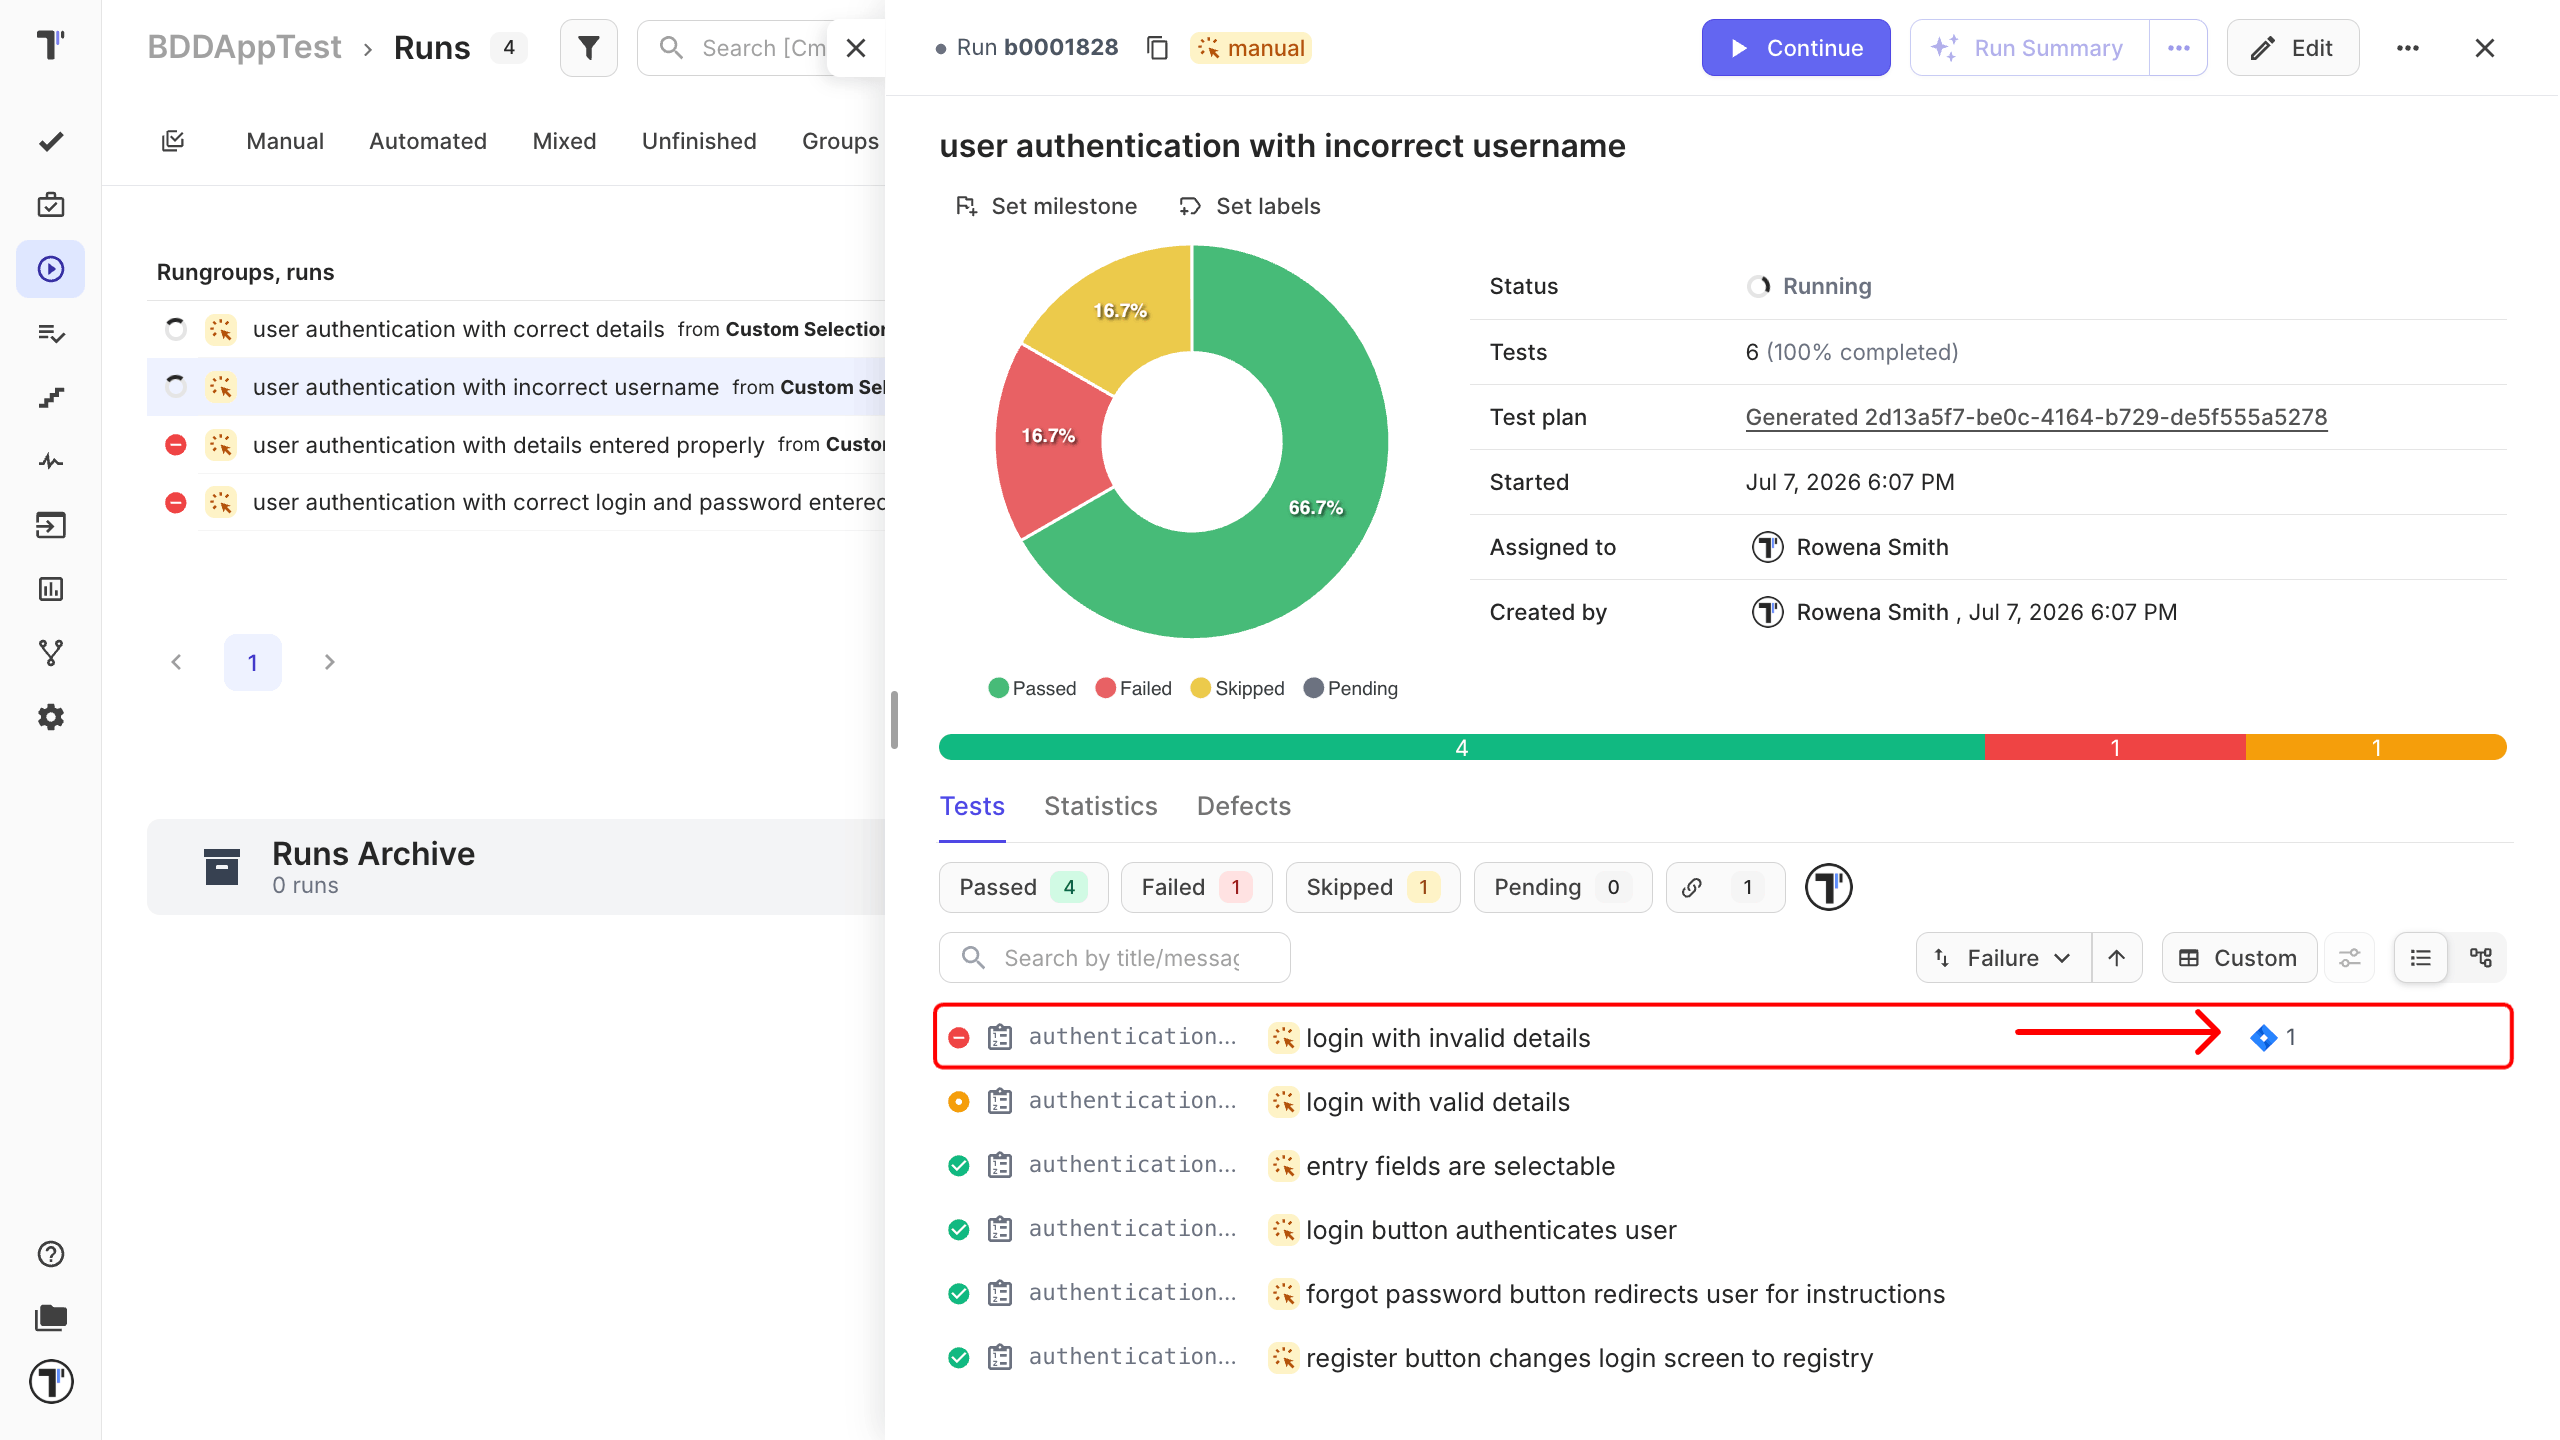
The link between the test and the Jira issue can be viewed in the run next to the reported defect.
Next steps
Section titled “Next steps”- Want cleaner bug reports? Set up a Defect template in Templates.
- Setting up other tools? See Integrations.